Creating a new section and linking it with Contentful
This guide will walk you through the process of creating a new section and linking it with Contentful.
Before you start
- Checkout the component development guidelines.
- Ensure a section doesn't already exist which is similar to your new section. Speak to the project lead developer before creating a new section if you are unsure.
Creating a new section
1. Run the section code generation script
From the pwa repo root directory run the command:
pnpm codegen:section --filter=@overdose/carrots-frontend
You will be asked to give your section a name. Enter a section name, eg. RichText

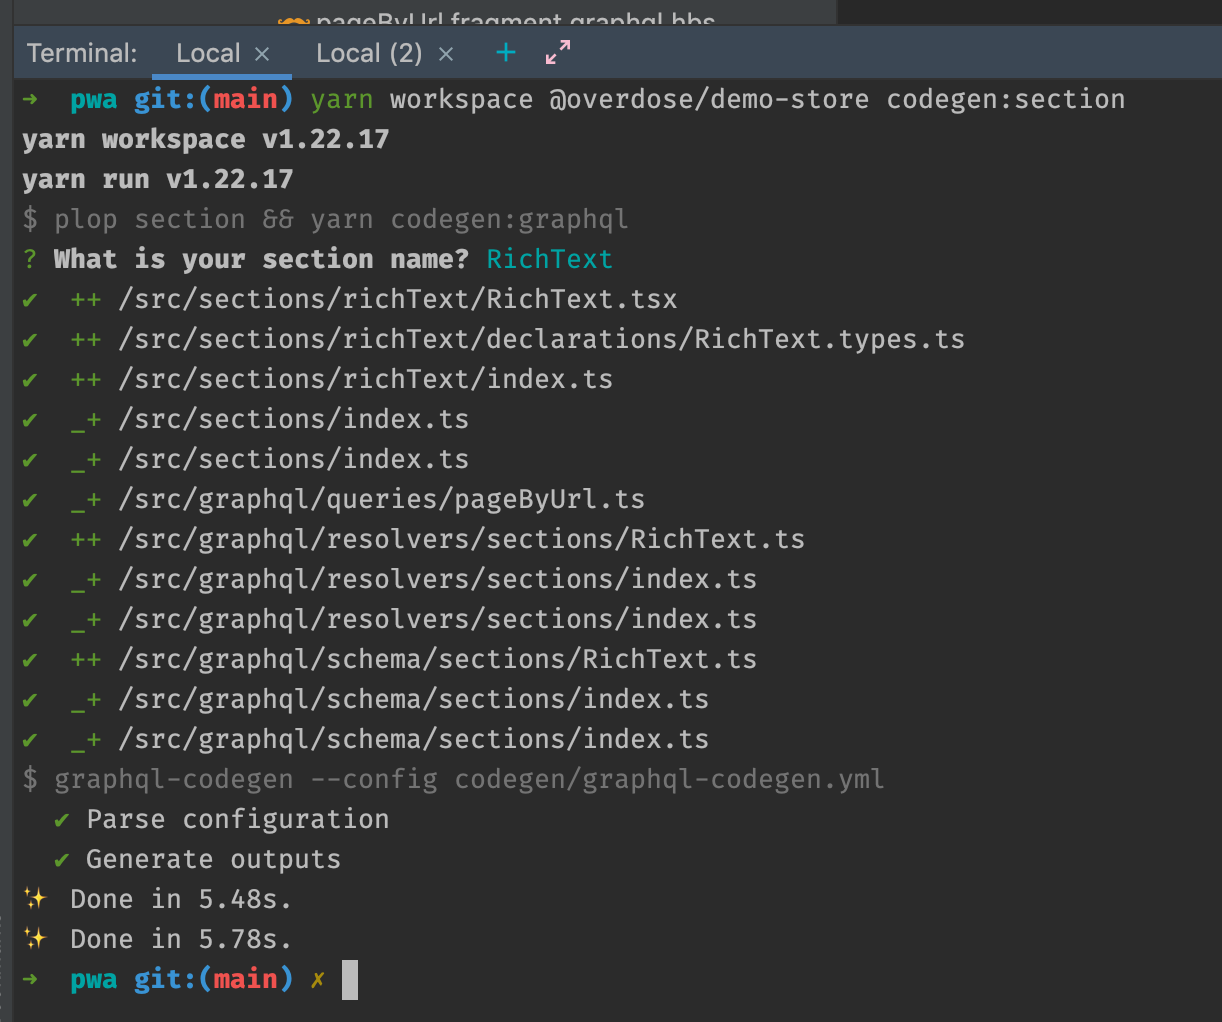
This will generate all necessary files to add a new section to the graphql schema. It will also create a new section graphql resolver and a section component.
The full list of files added or changed is output in your console:
2. That’s it!
Your section is now ready for use on the front end! Your new section has been added to the graphql schema, a resolver has been created, and TypeScript types have been created for your section component props.
You will probably want to customise your section too - if so, read on 👇
Customising a section & connecting to Contentful
1. Add required fields to section graphql schema
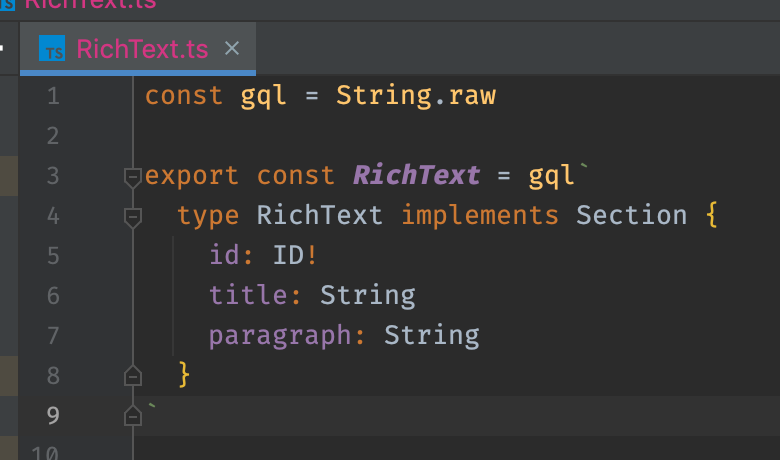
Open the generated section graphql scheme file. (eg apps/carrots-frontend/src/graphql/schema/sections/RichText.ts). By default your section will contain the fields id and title - both fields are required. Add any additional fields you require here.
2. Add new fields to PageByUrl query
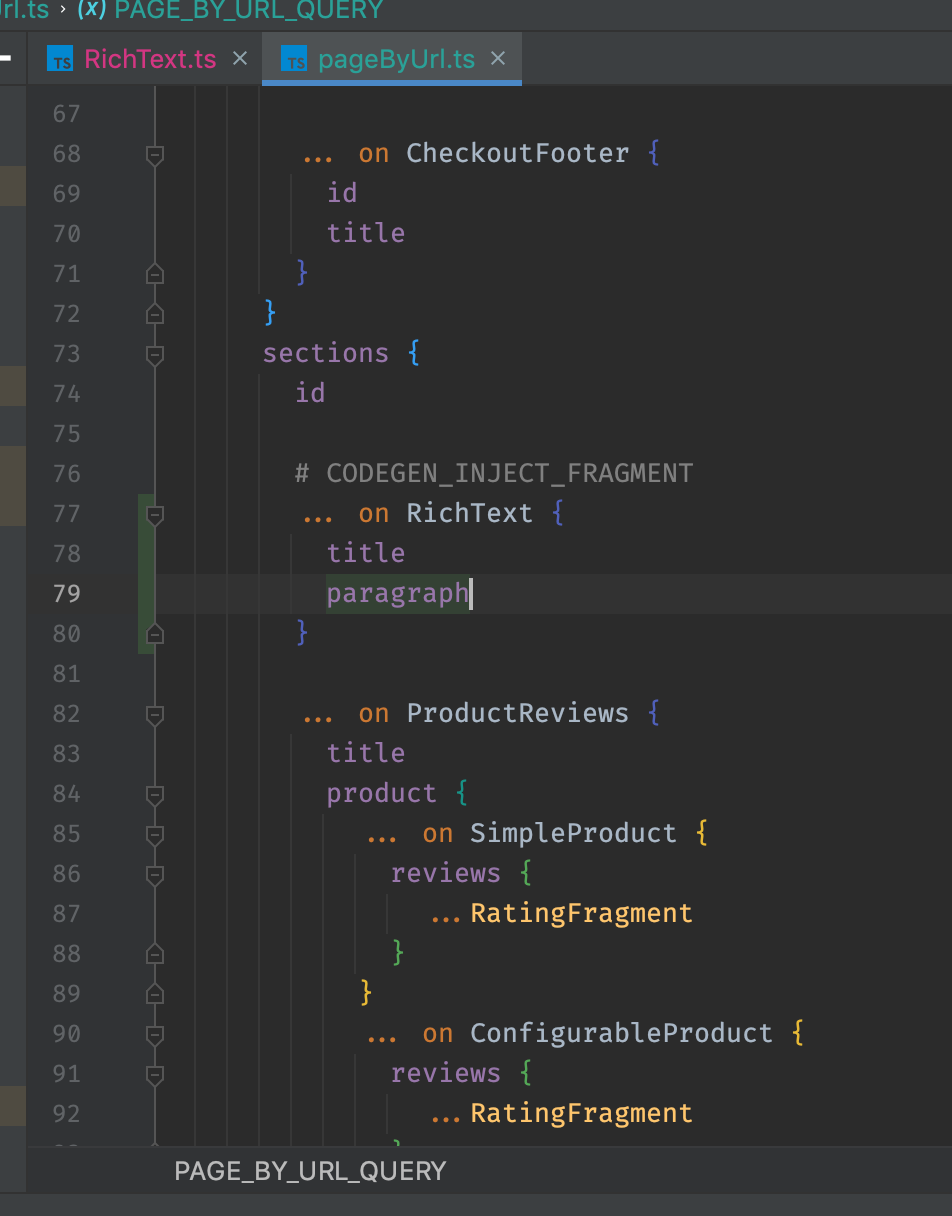
To make your new fields available on the frontend you need to add them to the PageByUrl query. See Anatomy of a page load for more information about this query.
apps/carrots-frontend/src/graphql/queries/pageByUrl.ts
3. Run the Typescript codegen command
From the pwa repo root directory run the command:
pnpm codegen:graphql --filter=@overdose/carrots-frontend
This will generate TypeScript types based on the provided graphql schema. A new section props type is automatically passed to your new section component.
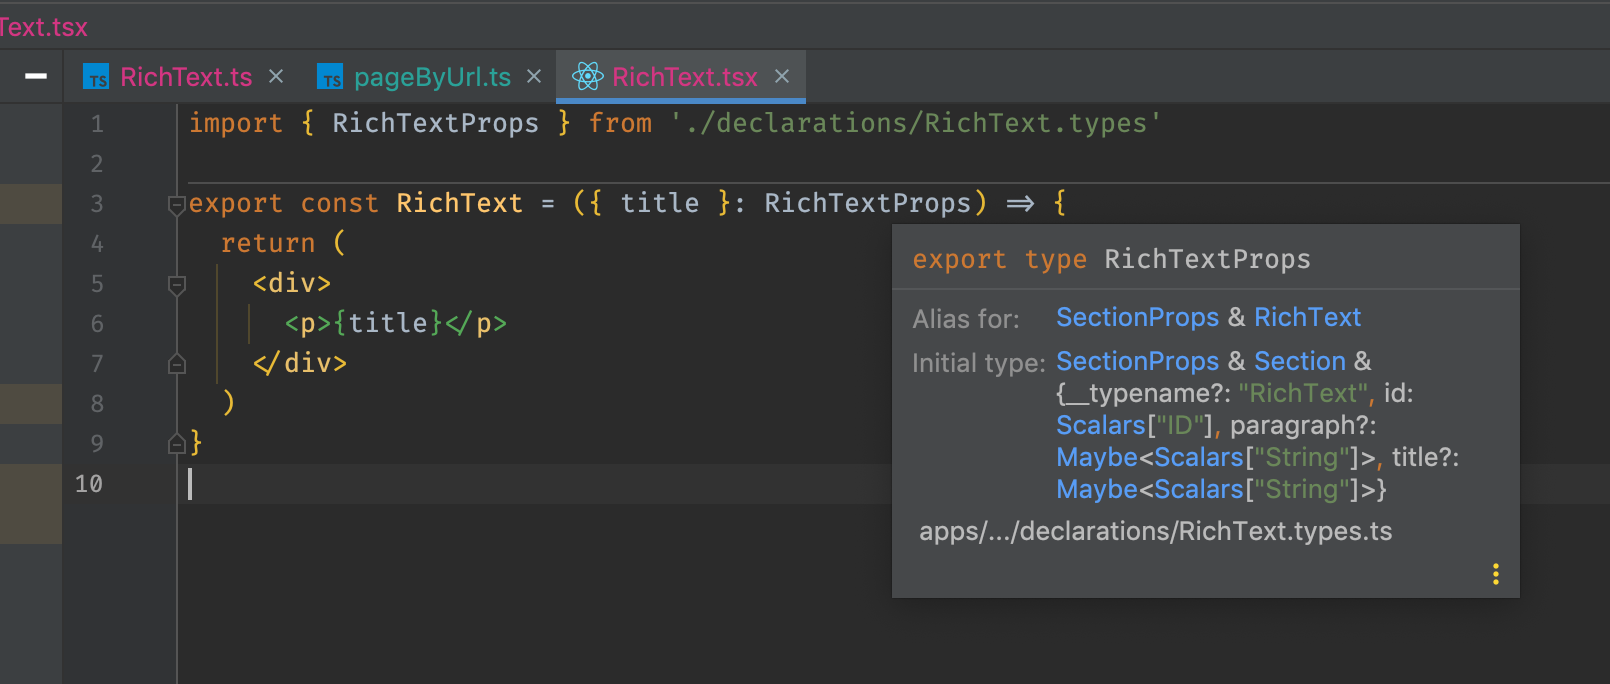
4. Modify the section resolver to modify or format data server-side
Apply server-side modifications our your section by modifying the new section resolver. This is also where you can call additional APIs. See: Retrieving data from a datasource in a section

5. Create your new section in Contentful
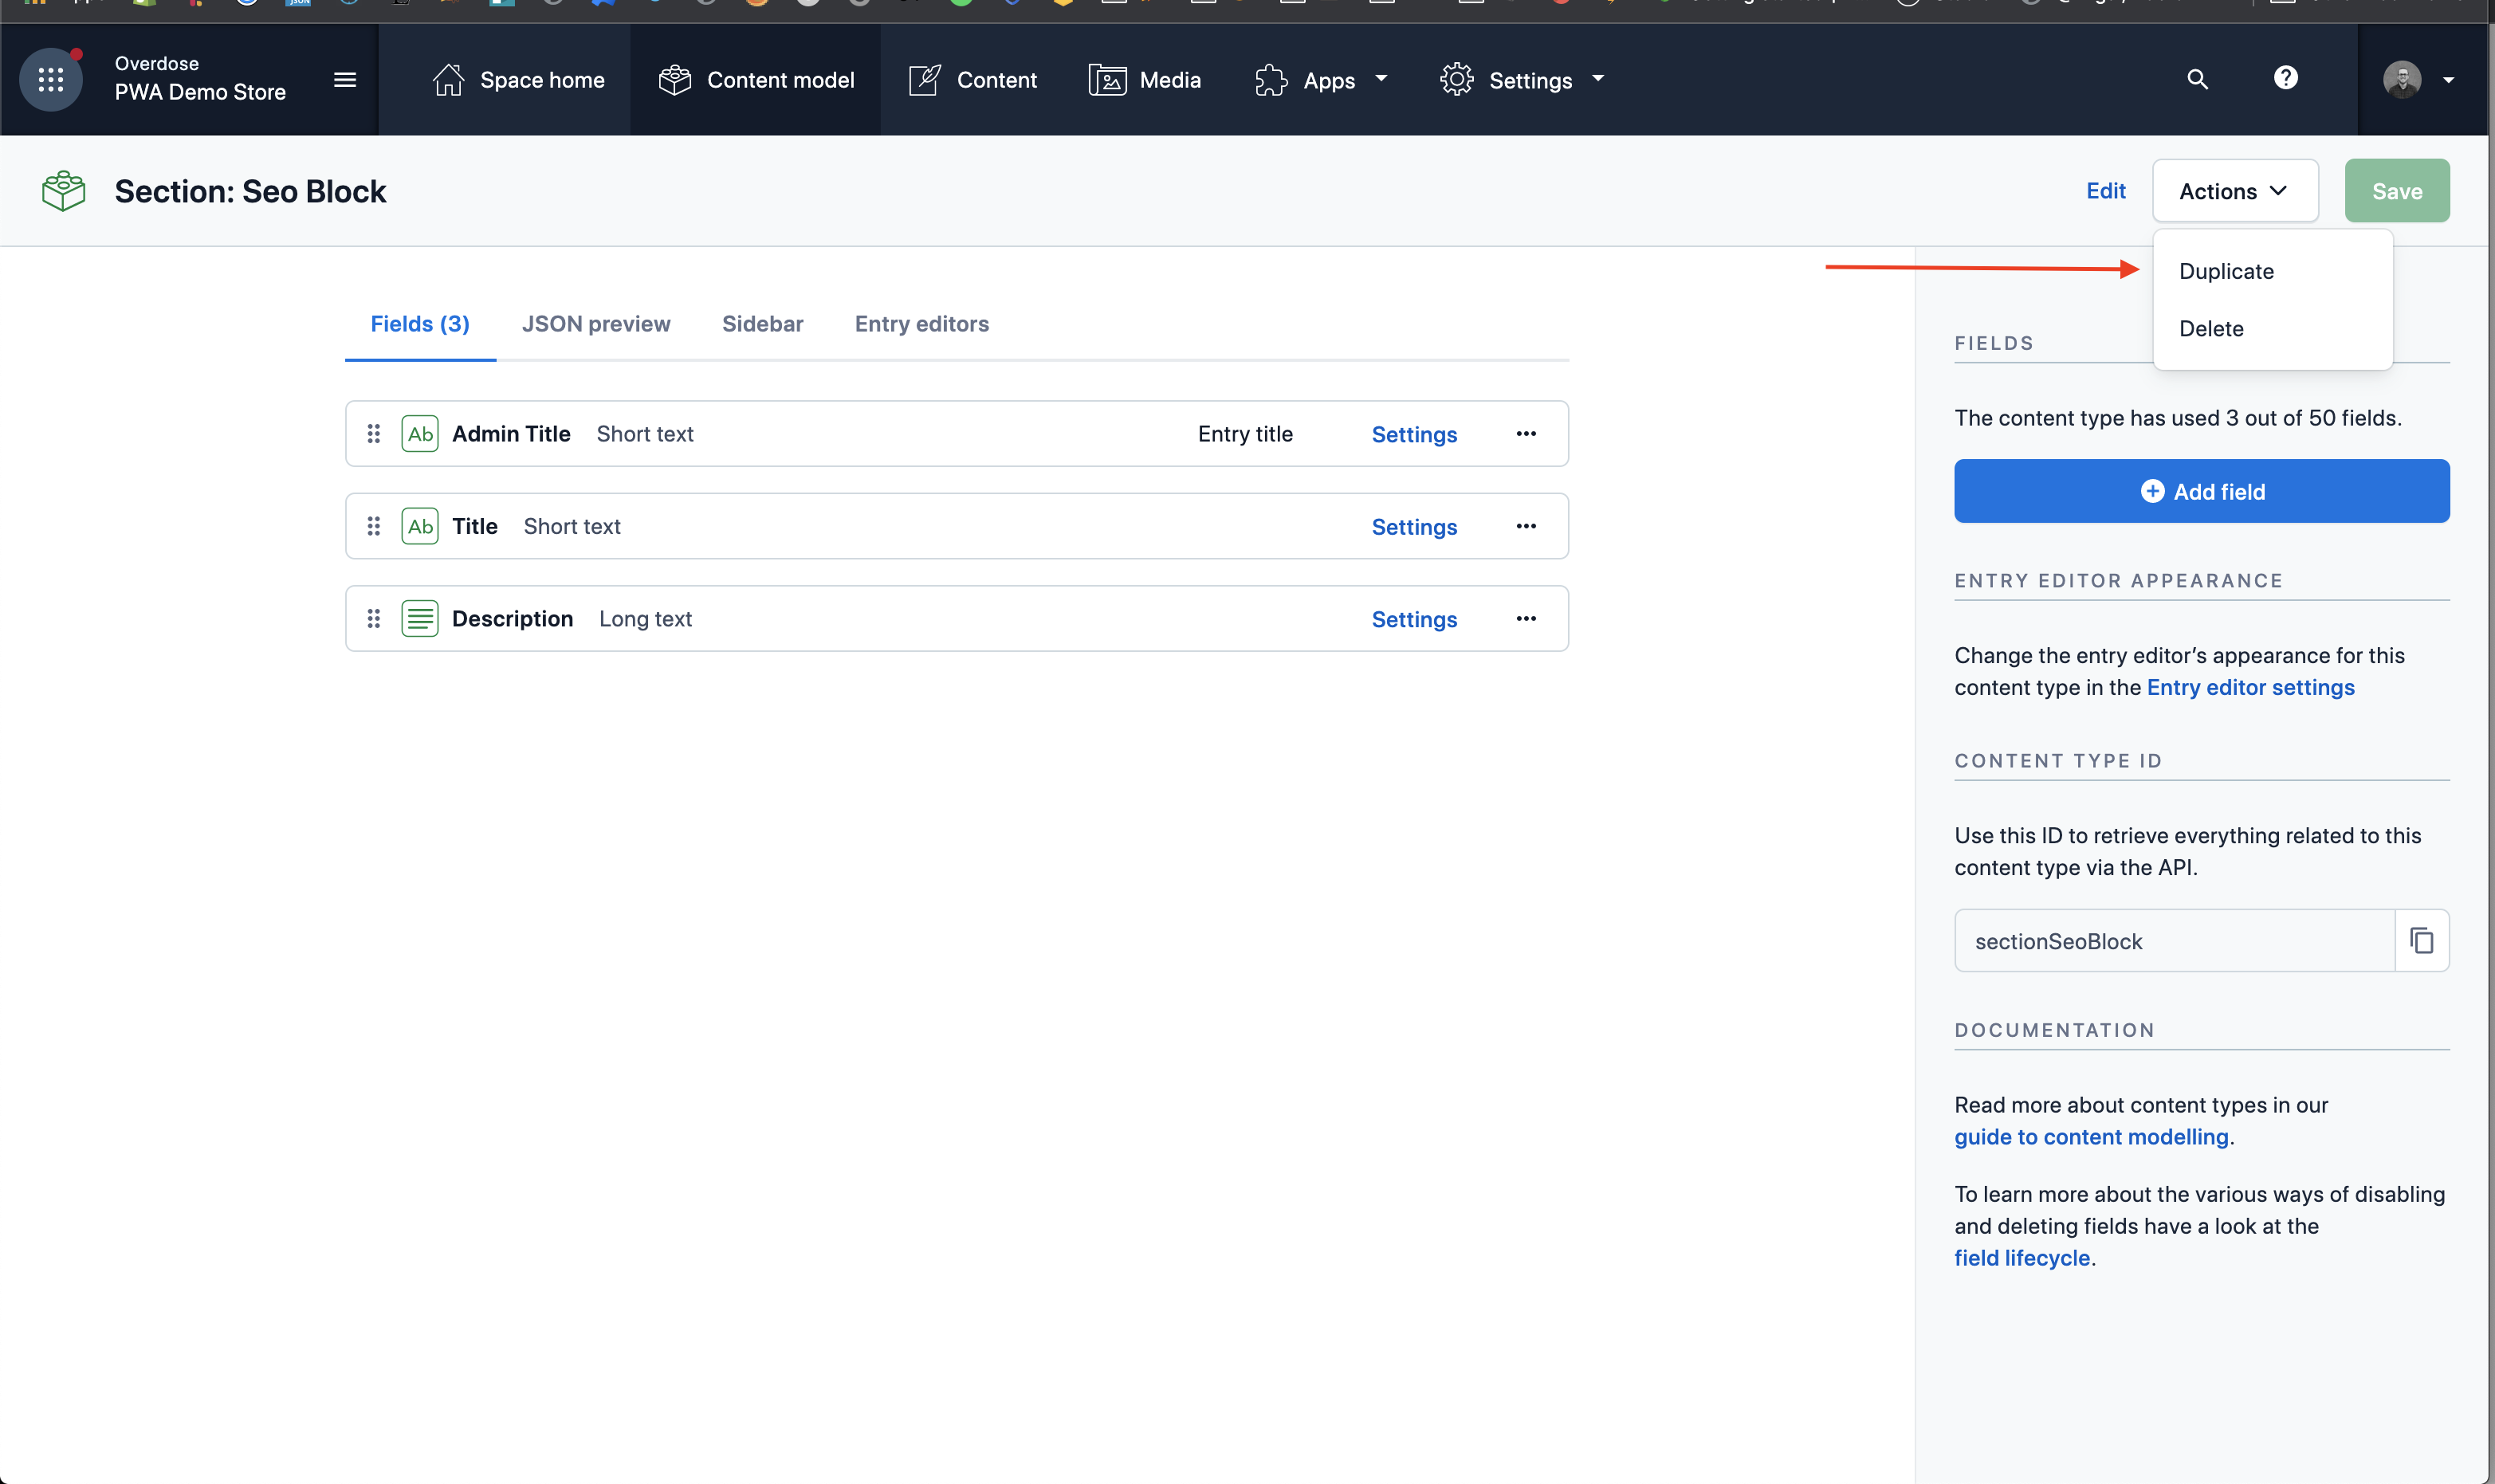
Login to the carrots-frontend Contentful app. Find an existing section which most resembles your desired section and duplicate it.
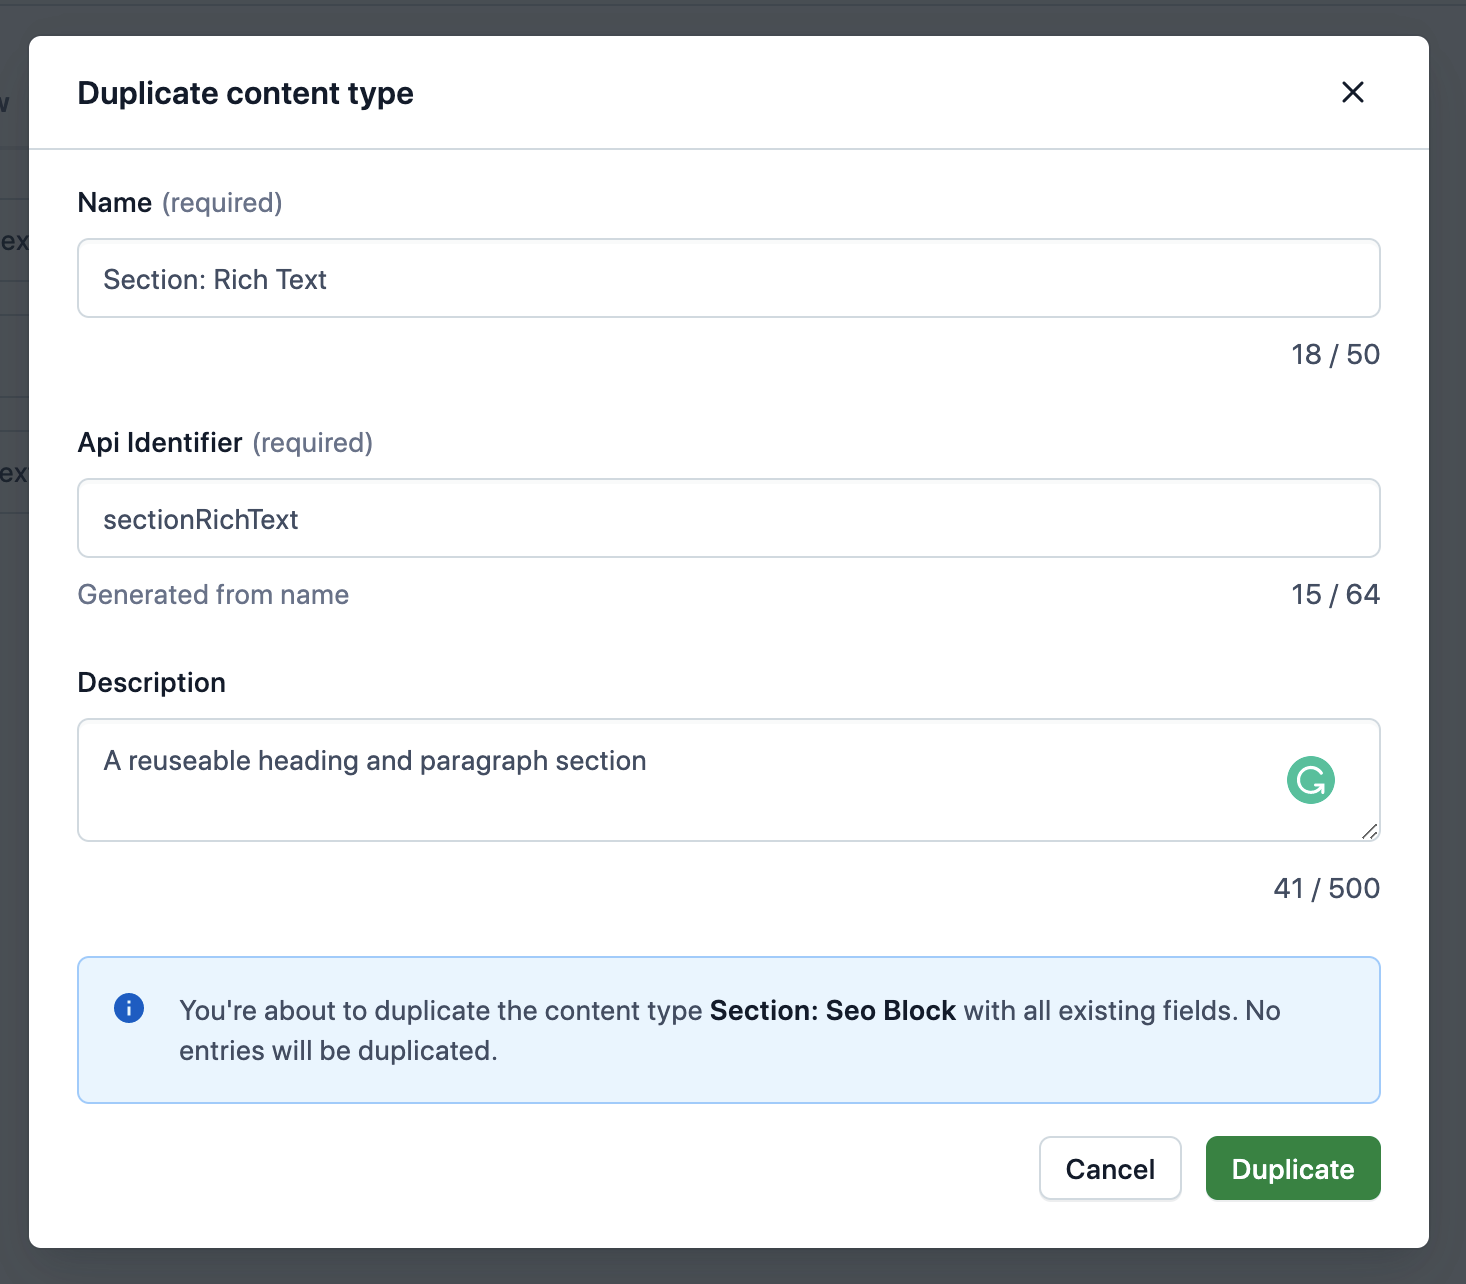
Create a new section using the existing name convention:
- Name:
Section: [Section Name](egSection: Rich Text) - this field should be in a human-readable format (not camelCase) - Api Identifier:
Section[SectionName](eg.SectionRichText) - Description: Give the section a short, useful description
Delete any fields you don’t need and add any new fields to your section as desired. Ensure Titles are human-readable, and field names are camelCase. Do not delete the Admin title or Title fields.
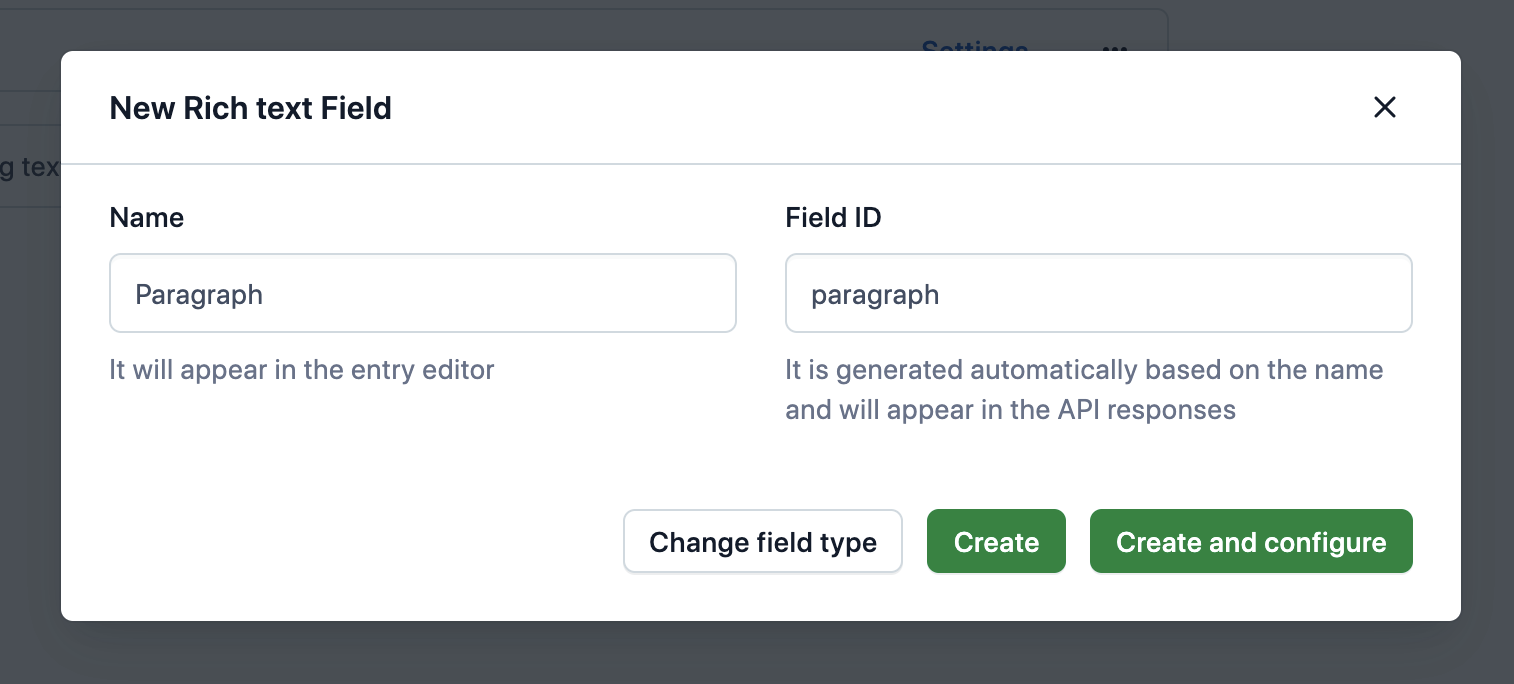
Press "Add field". Enter a Name and Field ID, then "Create and configure".
Select “Enable localization of this field” for all fields.
Once you have finished adding fields to your new section head to the Page Template content type. Edit the Sections field and under “Validation” toggle on your new section.
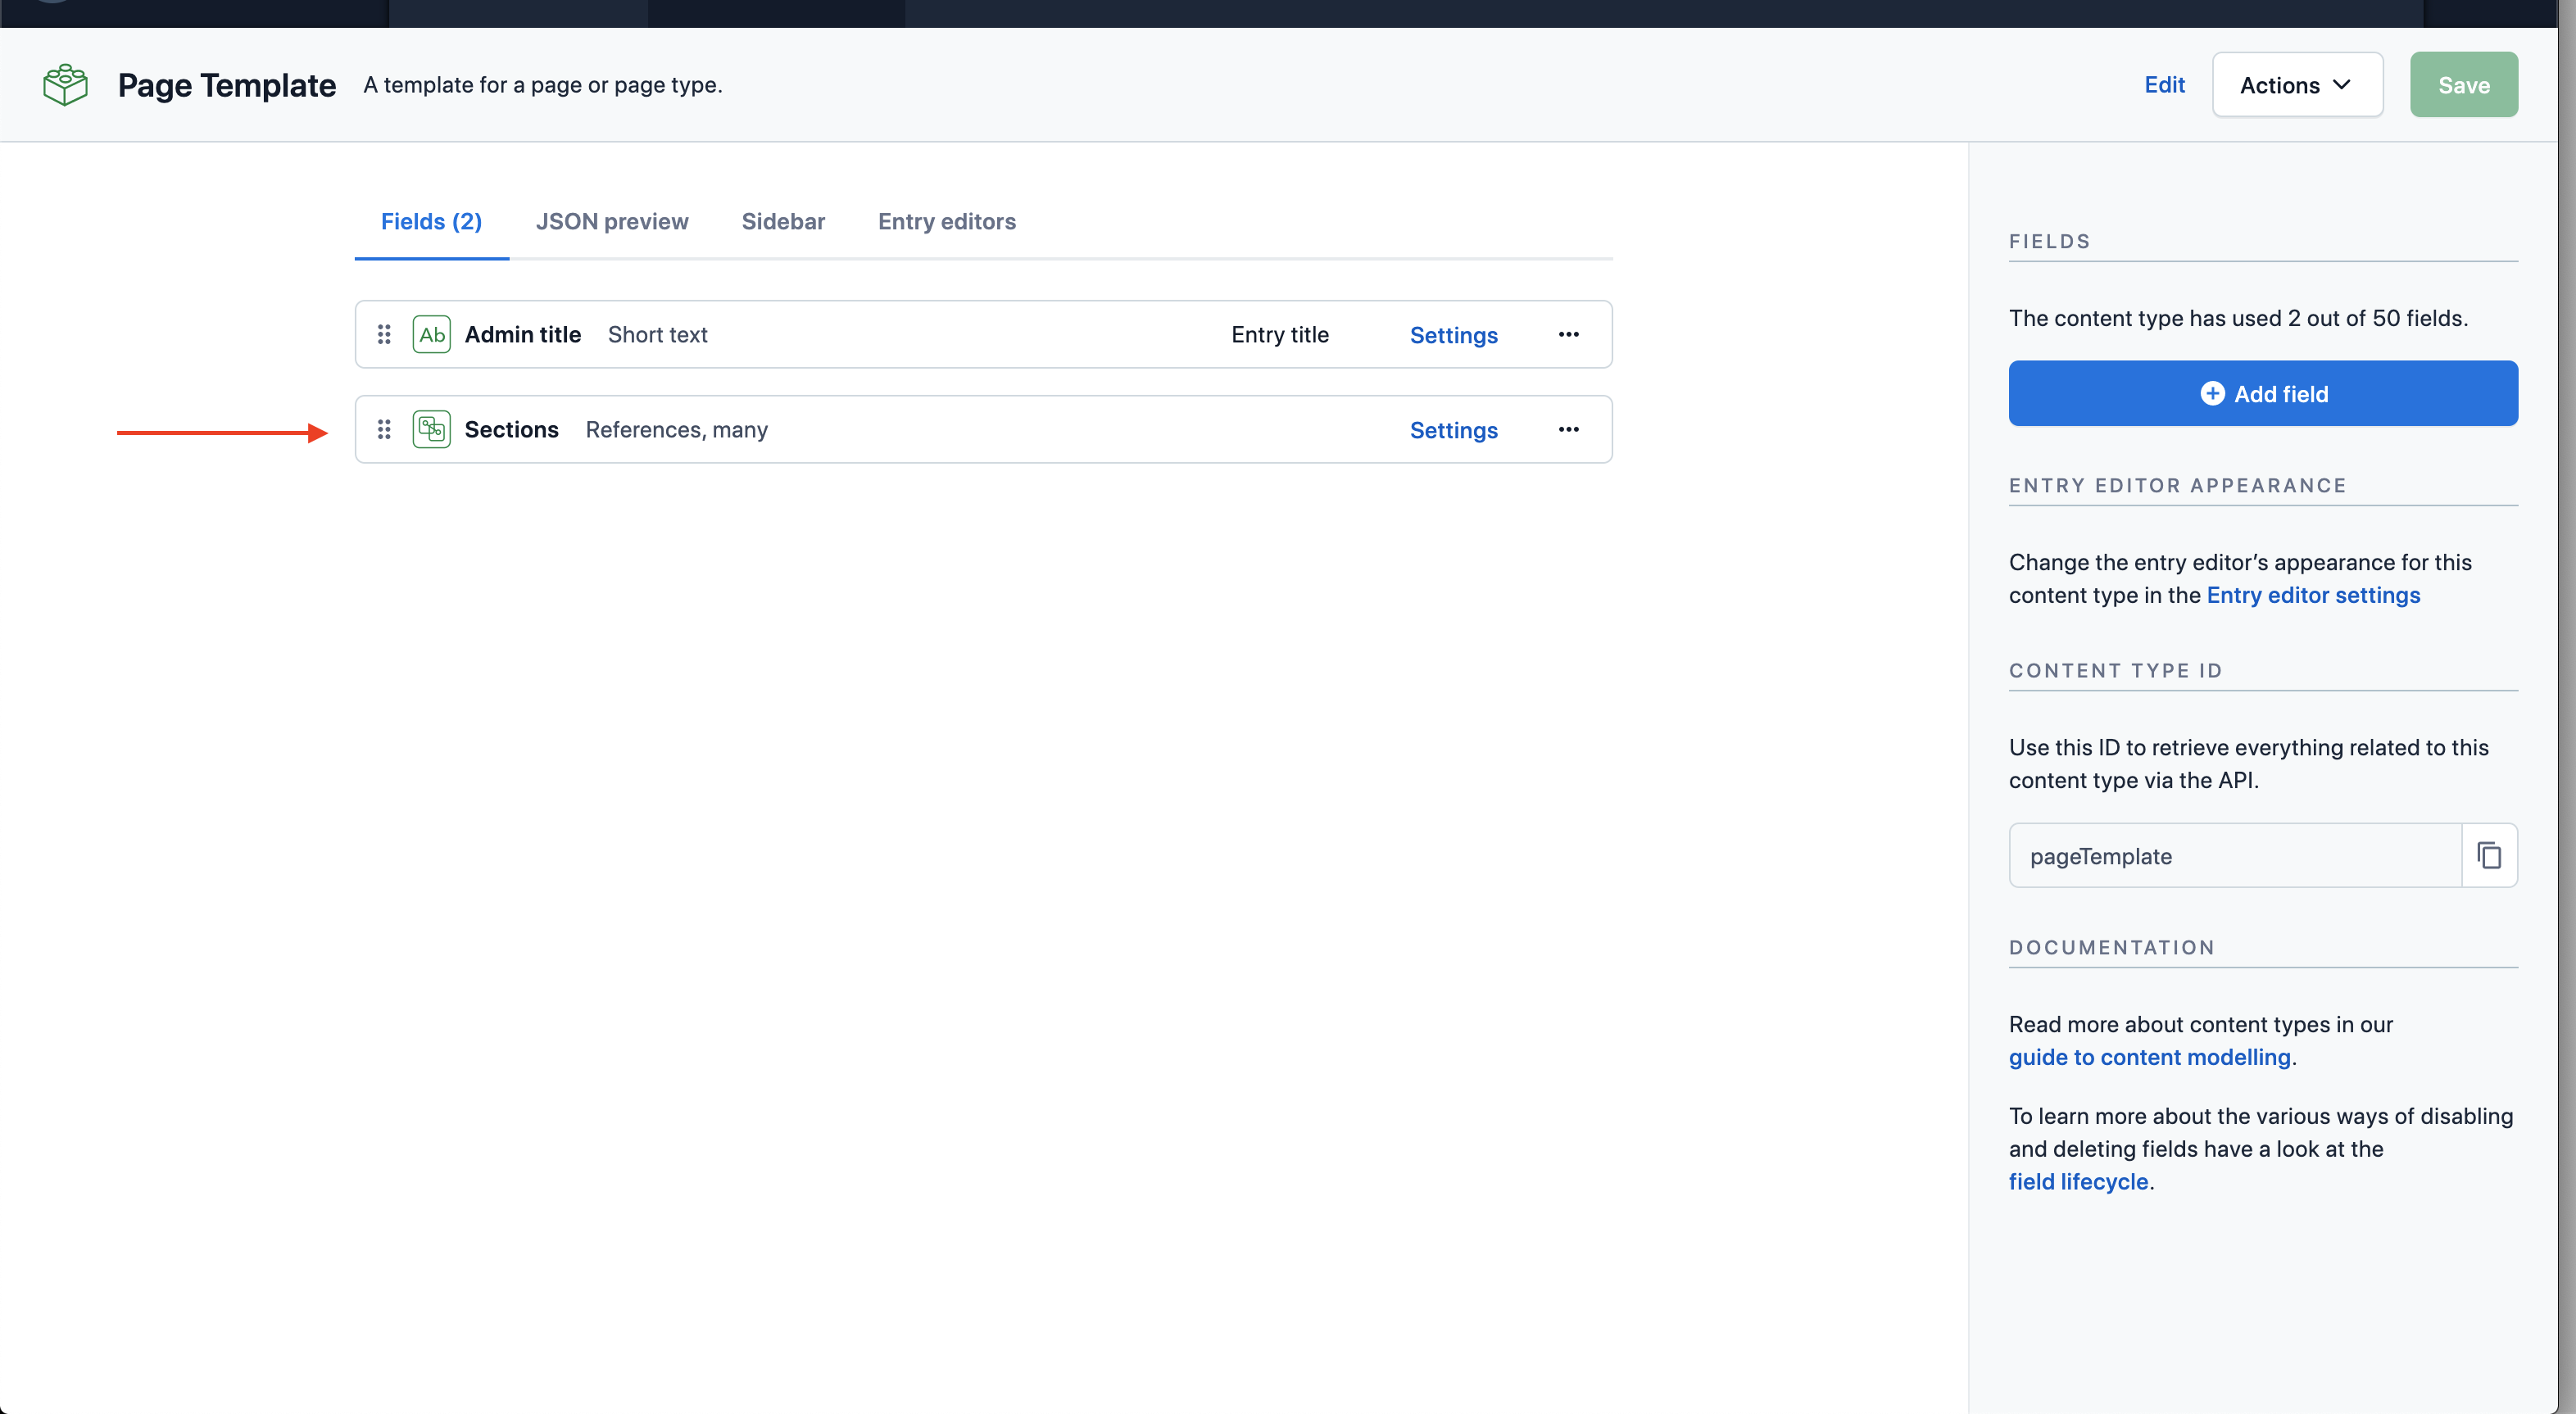
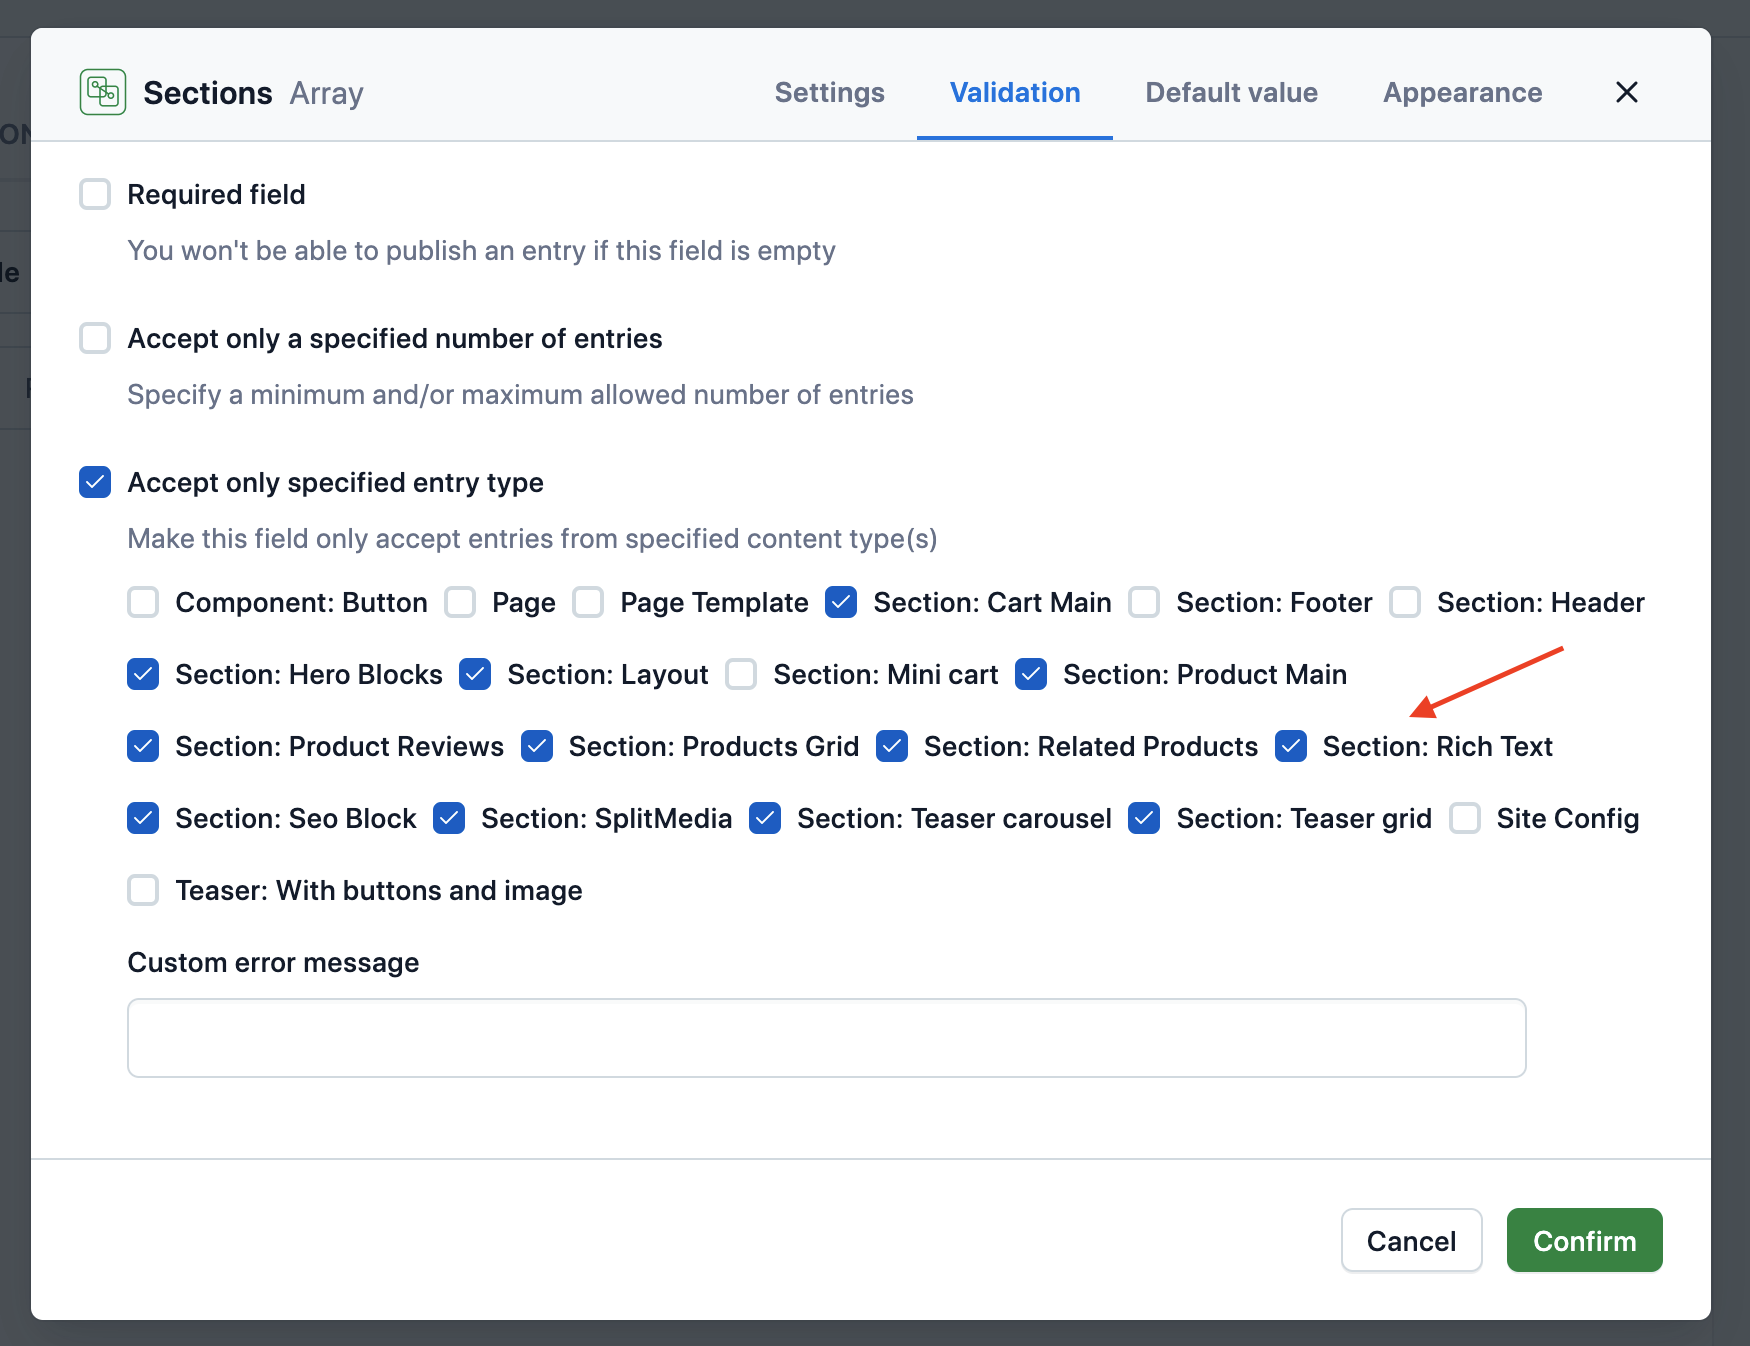
Your section is now ready to be added to any existing or new Template.
6. Hook up the Contentful data source to your new section
Add your new Contentful section to the Contentful data source query. Ensure the type exactly matches the Field ID you set up in the previous step.
apps/carrots-frontend/src/server/data-sources/contentful/fragments.ts
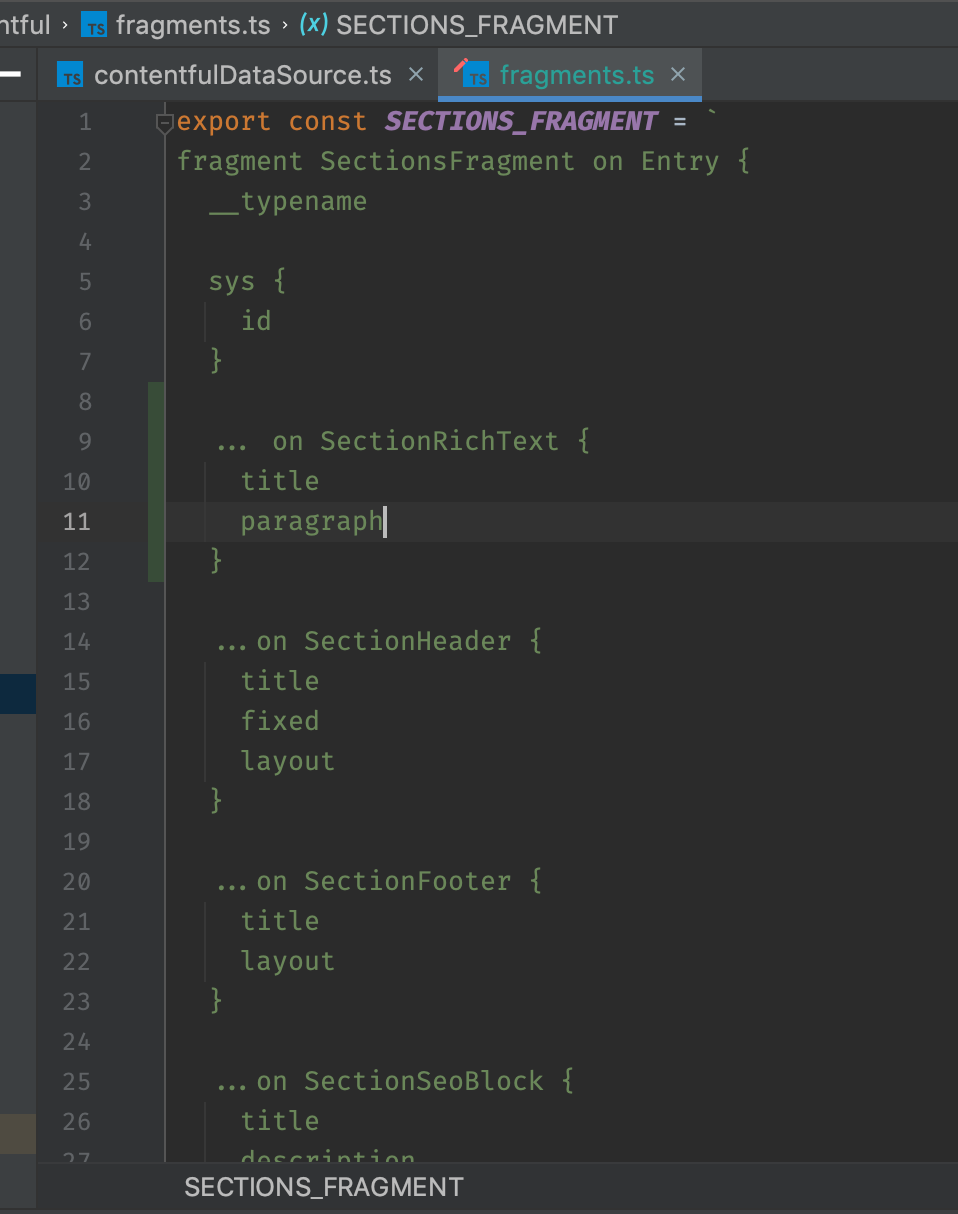
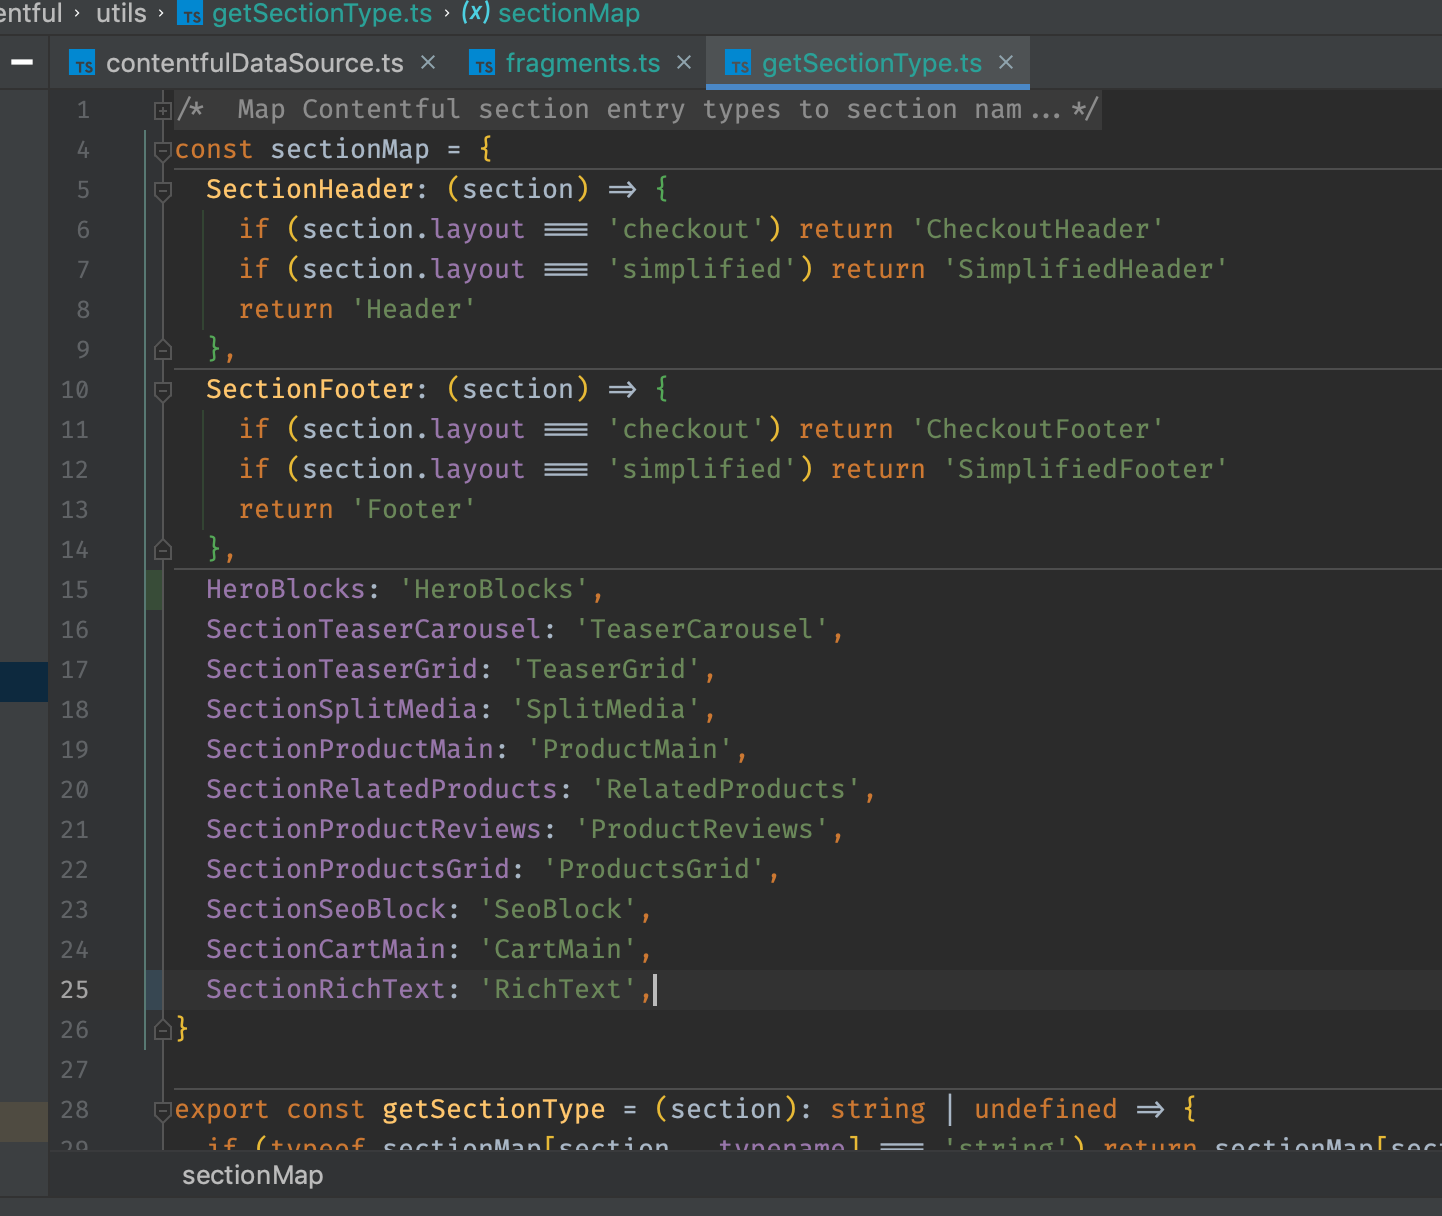
7. Map the Contentful section typename to your carrots-frontend section typename
Map the Field ID of the section you made in Contentful to the name of your new section in the project.
apps/carrots-frontend/src/server/data-sources/contentful/utils/getSectionType.ts
